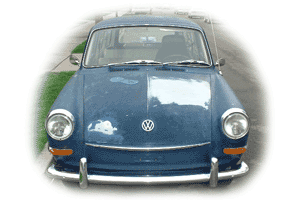
Sophy, My 1966
Squareback...
| This is my 66 Squareback, Sophy.
I bought her in the spring of 2001 from Listee Jim Adney. She is
a work in progress, but I am driving her daily. Her name is from
the greek for "sensible". Seems to fit.
Plans are for restoration back to basically
stock. She will not be a 100 point concours car, but rather a nice
daily driver with some minor updates that are not really visible.
Things like sound deadening and such.
She needs paint and some interior work.
I am current building an engine for her. Plan to have the engine
and the paint done before the trip to Parma in August of this year. |
 |
Load Floor Rebuild...
A.  B.
B.  C.
C.  D.
D.  E.
E.  F.
F. 
I recently repaired the rusted load floor
on my 66 Squareback. You can follow along on the sequence of photos
above. The photos can be clicked on to view a larger version.
Just use your back button to get back here.
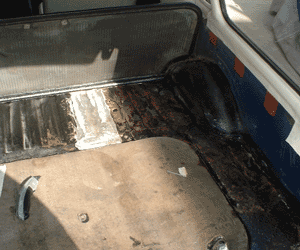
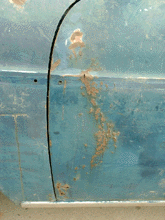
A. This is the "swiss cheese" that
I started with. I have a donor vehicle that will eventually provide
a permanent welded-in repair for this section of the rear load floor, but
in the interim I wanted to close up the holes in the load floor.
I decided to try a composite patch repair.
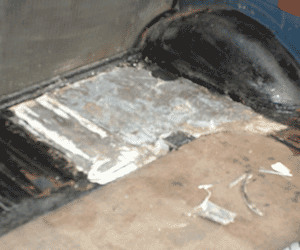
B. This is the first patch installed.
I used Bondo brand fiberglass resin gel and woven glass fiber. I
first wire brushed the rusty metal and then applied a coat of POR-15 rust
preventative paint. I scuffed this up some with a Scotchbrite pad
before applying the composite patches.
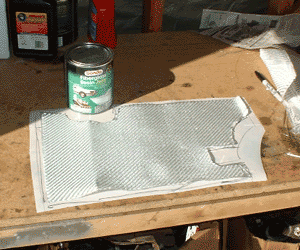
C. This is the fiberglass fabric
that i used for my repairs. The fabric is heavy enough that I ony
needed a single layer for this application. I used a sheet of plastic
as a carrier. I first mixed the resin per the instructions on the
can. I spread a thin layer on the plastic sheet. I then laid
the glass fabric on the resin and worked it through the fabric with my
fingers, a squeegee, and a stiff brush. I added more resin as necessary
to wet the fabric through with resin. I then applied the patch to
the car and weighted it down with sandbags and bricks and whatever else
was handy unitl the resin cured. This poarticular resin sets up pretty
quickly. I had about 15 mintues of working time. I was able
to remove the carrier film after about 45 minutes.
D. Here is the second patch installed
and cured.
E. After all of the patches were
installed and cured, I trimmed any loose fibers and sanded off any bumps
and ridges and rough spots. I then painted the entire thing with
POR-15 again. This shot show the rear load floor after all the repairs
and the POR-15 painting. Looks lots better than the rusty swiss cheese
I started with!
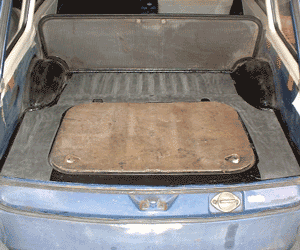
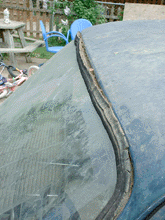
F. Finally, I applied the McMaster-Carr
high temperature mastic sound deadening material to the load floor.
I put some generic self adhesive foam weatherstripping (1/4" x 3/4") in
the engine lid groove and closed everything up. Started her up.
Man! What a difference! Car is a whole lot quieter.
Latest Pictures...
April 28, 20002


Click on an image to see a large version
of it. Just use your "BACK" to get back here.

Arrival...May
2001
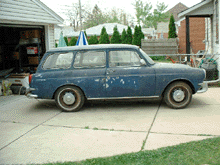
Here she is!
This is the latest addition to my family of T3s. I bought this 1966
Squareback from fellow Listee and T3 guru, Jim Adney. She is all
stock. 1600 single port. Dual carbs. 6 Volt Electrics.
Manual Transmission. Swingaxle.
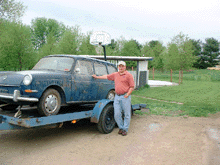 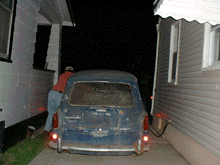
This is a shot of my new girl on the trailer
right after pulling her from the shed that she had spent the last 10 years
or so hiding out in and a shot of her as she rolled off the back of the
trailer at my house at midnight later that same day. Left at 5:00
am, returned at 11:30 pm. 800 miles round trip. About a $100
bucks in gas!
  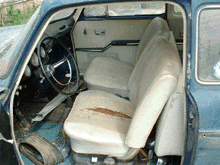
She is not perfect. There is a crease
and some minor rust on the driver's door. All the window seals need
replacing and the interior needs some attention.
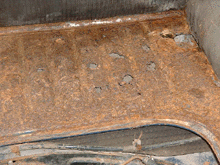 
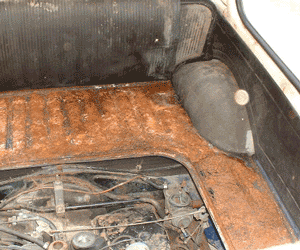
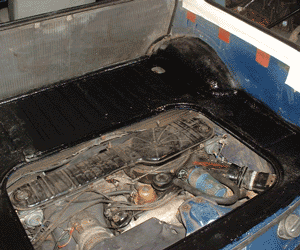
Found the only significant rust on the
rear load floor under the rubber mat in front of the engine access cover.
It is a bit of swiss cheese on one side. Will have to take care of
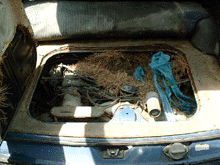
that. Also found that she was providing a home for some animal during
the time in the shed. Large nest of pine needles and insulation and
other bits and pieces covered one half of the engine. I decided to
pull the engine and make sure there were no other "homes" in the cooling
tin or other places.
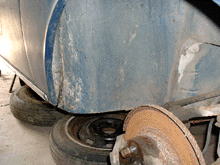 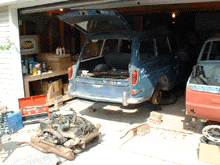
She is may not be perfect, but this is
about the nicest inner fender that you will ever see on a midwest T3!
All four are like this! The final shot shows her in her new home
with the engine out and up on jack stands waiting to have her brakes gone
through.
|