Jane,
my 1971 Fastback...
...a DARKSIDE work
in progess.
Learn all about her in the sections below.
Her
Story
Current
Project Status
Rustoration
Future
Plans
My
Car's Story
I originally bought this 1971 VW Fastback
in Erie, PA in 1992 from the first owner's granddaughter. She had 36k miles
on her and had been well cared for. The interior was black vinyl and in
perfect condition, the exterior was light blue and although the front fenders
had been replaced and repainted, the rest of the exterior was original.
The powertrain was completely stock and in great condition.
I drove the car for a little over a year,
but it was too nice to be considered for customizing, which is what I wanted
to do. I just could not bring myself to put her under the knife(torch).
I eventually sold her to my wife's cousin in NY state. Pam drove the car
for 3 years, putting on an additonal 30k miles or so. When her family grew
too large for the Fastback and it began to show the signs of having spent
3 winters on the NY roads(rust), Pam parked the Fasty with a FOR SALE in
the window.
In 1996, I bought my girl back. The only
problem was she was in NY and I was in MI by that time. She was no longer
road worthy enough for the 600 mile trip, needing brake work and an exhaust
at a minimum. It took me a year and a half to finally get her back to MI,
but she finally arrived in June of 1998.
I began the process of stripping her down
for rustoration and a custom interior. In the fall of 1998, I switched
jobs again and she made the trip to MN in the moving van with all of our
other stuff.
May 30, 2000
After spending one year in the frozen North,
I went back to work for Ford and she made the trip on the moving van back
to Dearborn, MI. Check out the Current Status
for more information on her current state.
March 31, 2002
Well, I have not done much with Jane during
the last year or so. Not since getting the 66 Squareback. I
am actually a bit ashamed to say that she has been neglected.
I have even "borrowed" parts from her for the Squareback. 8^( But
I have not given up on this dream project of mine. She is just on
hold until I can get the Squareback painted this spring and the engine
rebuilt for the trip to Parma for the Invasion. Then I promise to
get back to the rustoration of Jane.
Just a bit of explanation about her name.
A while ago there was a thread on the VWTYPE3.ORG List discussing the various
versions of the Fasty, Square and Notch. I posted Jane's (then nameless)
VIN to the List. Russ Wolfe replied that she was a "plain jane" basic
71 Fasty. I thought it was an interesting contrast to the future
plans that I have for Jane...so the name stuck.

Current
Project Status
April 1, 2002
Jane has been put on hold while I work
on getting her sister, my 66 Squareback, on the road and ready for the
trip to Parma, ID for the Invasion. She has also donated her engine
longblock for a rebuild to go in her sister. This was necessary since
I am now driving the 66 Squareback for daily transportation. Hard
to rebuild the engine and drive her at the same time.
I have not ignored Jane altogether.
I did pick up a new rust free floorpan for her. I will be POR-15
coating it ce the weather warms up.
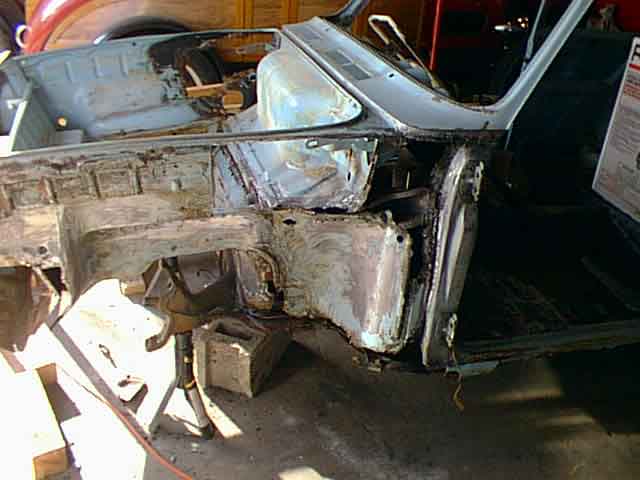
November 26, 2000
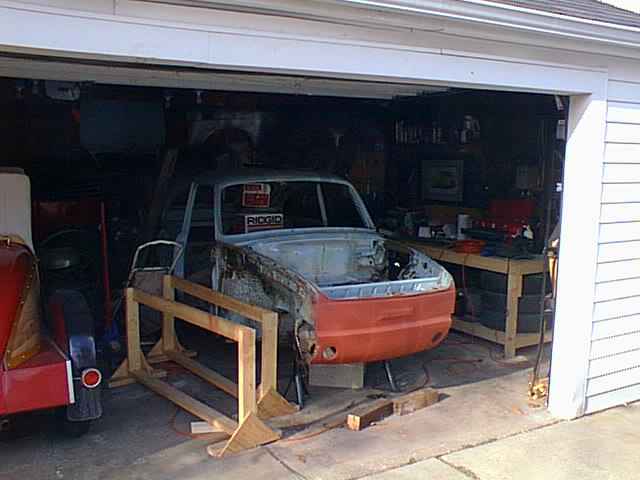
Here is Jane resting comfortably in her
latest garage. She is basically just a bare shell sitting on the
pan. All the bolts have been removed to separate the body from the
pan, but I need to do some structural reconstruction before I separate
them or she might just fold up in cople of places. Check out my Rustoration
page to see some of the rust that I am up against. I have been
actively practicing my welding techniques, but I am still a little ways
from being comfortable with putting the torch to "real" parts on my baby.
I have also been busy sandblasting lots of bits and pieces, getting them
rady for paint and restoration. Check out the pictures and captions
below for more details.
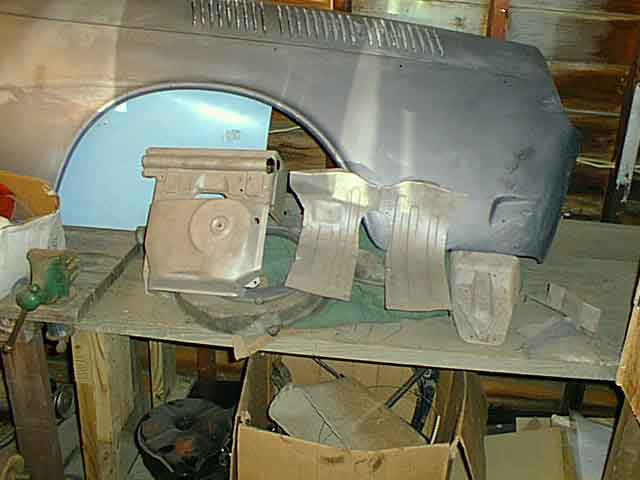
BTW, the car on the left above is a coachbuilt
Model T Ford. It belongs to my neighbor, not me. The interesting
thing about this car is that the rear end is the front clip and hood from
a Beetle. Very interesting.
Click on any of the pictures to see a full
size version. You will have to use your browser's BACK
button to get back here.
|
|
|
|
| Here is some of my engine tin after getting
hte blasting treatment. The blaster leaves nice clean metal with
a great surface for painting. Really nice to see the bare metal without
all the old paint, rust and grime. |
Here is the rear engine crossmember after
the blaster treatment. You can also see some of the rust that I am
up against in the background. |
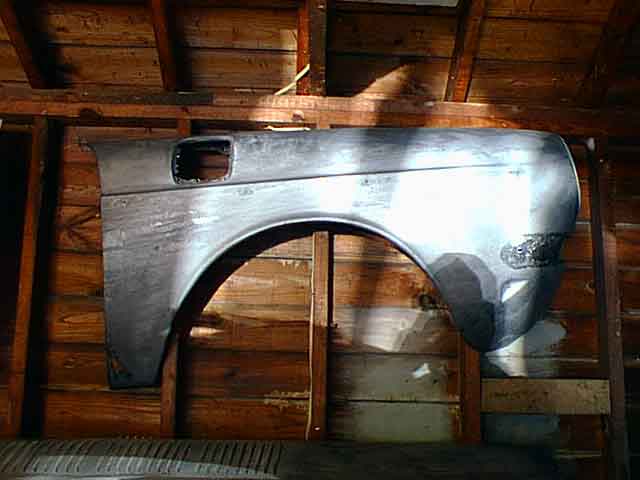
Here is my right front fender after I
completely stripped it of paint. It is in pretty good shape with
only one small rust hole at the bottom behind the wheel well. I removed
the inner sheetmetal for the fuel filler. I am going to fill this
section and smooth it over. The fuel filler will be under the hood
like the early cars. |
Here is one of the "early" rear fernders
that I got from Russ Wolfe. I have also stripped both of them to
bare metal. The bare sheetmetal is great to see. I have treated
all of the bare sheetmetal with an acid metal prep to keep them from rusting
until I can get them in primer. |
Rustoration...or
the miracle of resurrection
November 26, 2000
Click on any of the images to view it
full size. You will have to use the BACK
button on your browser to get back here.
|
|

|
|
| This is what is left of my
front bumper mount. The other side is about the same. I will
be fabrticating a new piece of sheet metal for this section. I don't
plan to use bumpers, so I can skip the mout details. |
This is easily the worst spot
on the whole car. I have started to clean up the area and cut away
the rusted metal. I have also treated this area with an acid metal
prep to stop the rust and convert it. I will be using POR-15 after
the welding repairs have been made. This one will take several patches! |
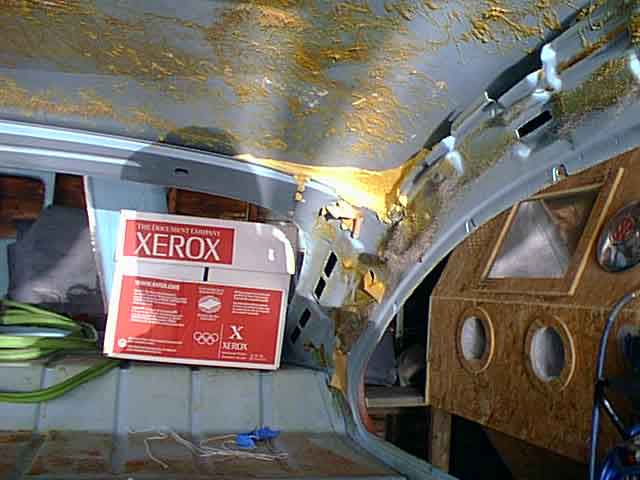
Here is a shot of the foam
that VW used in the c-pillar of the Fasty. This area is often prone
to rust if the flow-thru vent drains get clogged and the foam gets wet.
It holds the water and the section rusts from the inside out. Fortunately
my car is not rusty here. |
|
Previous Stuff
Click on any of the images to view it
full size. You will have to use the BACK
button on your browser to get back here.

|

|

|

|
| This is the worst spot on the "hole" car.
Driver's side inner fender well is completely rusted through. Yes, that
is the grey concrete floor that you see through the hole. The pan is really
not too bad in this area. It is the body that is shot. |
The passenger side is not as
bad, but still have a hole clear through. I will need to rebuild both sides
of this section (inner and outer) |
This is under the rear seat.
The hole in the center of the picture is where the rear seat belt was "anchored". |
This is the front end under the gas
tank. Most of this rust is related to clogged drains on the fresh air plenum.
|

|
|

|

|
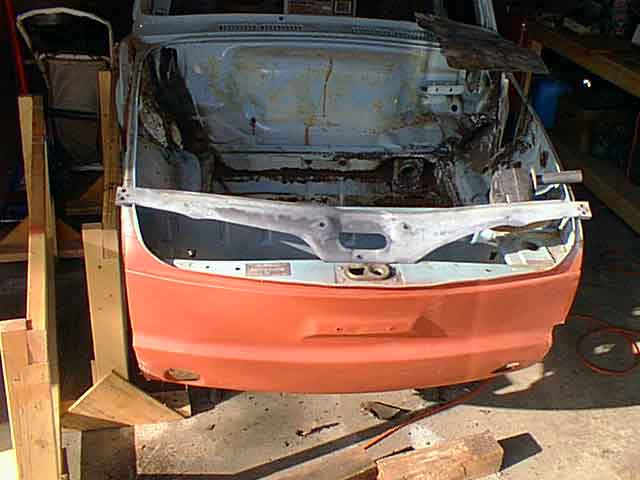
| The passenger side inside the front trunk.
The black area is a previous repair around the gas filler neck. You can
see more evidence of the clogged fresh air plenum vents here too. |
Here's a shot of the driver's side front
inner fender well from the outside. The rust is pretty extensive. It is
the areas like this that have me considering the "channeling" (see my Future
Plans page) of the body for the lowered look. |
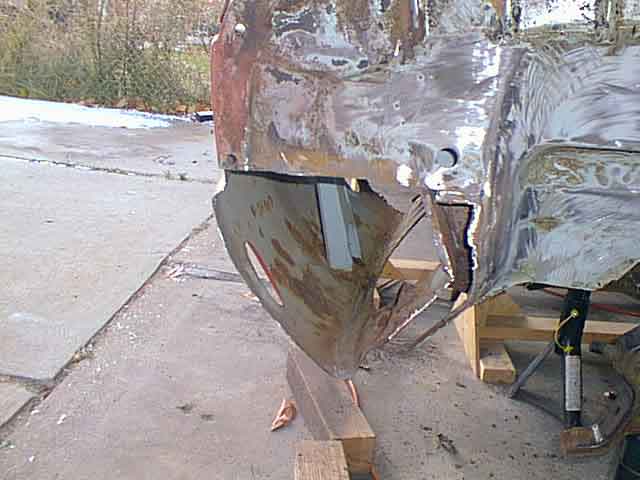
The front bumper mounting surface....or
at least what is left of it. The PO had welded the bumper bracke to the
body here and did not do anything to rust-proof it. The heat effected metal
around the welded area was paper thin due to rust. |
The bottom of the rear airboxes.
The flapper vents had been bondo'd shut as part of a previous repair. The
honeycomb looking stuff at the bottom of the body is actually body that
has been applied over a wire mesh.....not a good way to repair a rusty
section of sheet metal. |
Future
Project Plans......Click on any image to view
a larger version.

|
This is an illustration that I did of
my car in the future. Lowered, custom wheels and low profile tires, "ground
effects", power pop-out windows, new exhaust, early style rear fenders,
etc, etc, etc. |
 
|
More wild ideas....this is the proposed
dash for my Fasty. The illustraion on the left is a computer image that
I originally created for the dash. The photo on the right is of the 1/4
scale foam model that I am working on of the dash. I will use it to create
templates which will be scaled up and used on the actual dash. The dash
will be custom fabricated of fiberglass composites with white-faced vintage
gages, integrated center console, etc, etc, etc. You can also start to
see what I am planning for the door panels. |
|
In addition to the custom dash, I am planning
on installing a pair of black leather Mustang seats. I got these seats
from a friend at Lear for installing a kitchen floor for him. The illustration
I did to help me layout the brackets I will need to fabricate to install
the seats. |
|
Another area I plan to re-engineer is
the heat system. Since I don't live in the VW mecca known as SoCal, I will
need heat. I plan to reconfigure the system so that it recirculates the
air in the car and adds heat to it. It will also have an electric fan for
moving the heating air. This will free up the engine fan for engine cooling
only. |
|
The bottom 3-4 inches of the body of my
Fasty is pretty rusty (as in "Fred Flinstone" rusty). I am considering
"channeling" the body to lower the stance of my ride and still be able
to keep the suspension geometry close to stock. "Channeling" the body over
the chassis is pretty common among the street rod crowd. Have never seen
it on a VW. Just might try it.... |
|